Laying a floor, especially a ‘hard’ flooring like laminate or tiling, can be a tricky proposition at the best of times and that’s assuming the floor is even, to begin with. An uneven floor just makes things even more difficult. To get an even floor you need to get a screed down first. A screed is put down on top of the subfloor before anything else is laid, and this gives you a nice and even surface with which to lay down your flooring of choice on top of.
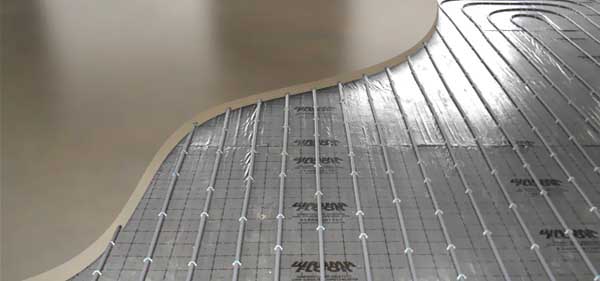
If you had underfloor heating in mind then the screed can be put on top of the piping, although the pipes should be inside a conduit. This allows the metal to expand/contract freely, without the risk of cracking the screed.
There are two types of screed that you can go for – liquid and traditional. Let’s take a look at them both, and explain the pros and cons of each.
Traditional Screed
After laying down traditional screed, you will have to give it roughly 5 days before you can do anything else because you will not able to walk on it before this time-frame is closed. It is a long time to wait, especially if you are working on a tight schedule, and it cannot be rushed or hurried along.
While it does take its time in becoming dry ‘enough’, the traditional screed is very versatile and can be laid almost as thin or as thick as you like; the effective range is between 40mm and 100mm. It all larger depends on whether the screed is being laid over anything else like heating pipes or insulation.
Liquid Screed
Liquid screed dries much more quickly than the traditional variety, and you can be walking on it between 24 and 48 hours after it is laid. This has obvious benefits for your project, and if the flooring is for a new build other trades such electricians will be able to get in much sooner and get on with the task at hand.
With liquid screed, it is possible to put down as much as 2,000sqm per day which is over 16 x more than what is possible with traditional screed. When it comes to larger properties, such commercial premises, liquid screed has the obvious upper hand.
There is one more trick up the sleeve of a liquid screed, and that is if you need the screed to be ‘walk dry’ sooner than the average 24-48 hours, then it can be helped along to make this happen. If your project is going ahead in cold, damp conditions or your deadline demands a faster solution, then force drying the screed is going to bring you results much, much faster than simply allowing it to dry on its own.
Cost vs Reward
Screed is always priced at per square metre, the liquid screed is usually a smidgen more than traditional screed – literally a £1 or £2 difference. While this can add up, especially with larger properties, liquid screed can actually end being much more cost-effective in the long run. How? Well, mostly because of the drying times vs project costs.
The longer a project has to be on hold because one element needs to be finished before anything else can go ahead, the more it is going to end costing in the end. Of course, this is not the only consideration.
Because liquid screed conducts heat much more effectively than a traditional screed, a much thinner layer is needed over heating pipes which also reduces the end cost. Traditional screed, for example, would need to be around 65mm thick when placed over piping whereas liquid screed only needs to be 40mm thick for the same job. Being faster and easier to put down, liquid screed also requires fewer man-hours.
So, you can see how while the cost per square meter is slightly higher, London flow screed brings cost reductions in other areas which actually ends up making it the cheaper option – and the most beneficial one too.
